Host your static website cheap with Amazon Web Service Simple Storage Service
Why use Amazon S3?
It's cheap!
The free tier gets you this:
- 5 GB of Amazon S3 standard storage
- 20,000 GET Requests/month
- 2,000 PUT requests/month
- 15GB of data transfer out/month
In other words, I could let people download ONE ENORMOUS 5GB (what files are this big?) file three times a month for free.
Or I could let people download one 250 KB file (music?) 20,000 times a month for free.
After one year it's not free. How much does it cost? Less than two dollars a month!
OK, great. So how the heck do I do this?
- Build a web page
- Do you have an Amazon Account
- Copy it to Amazon S3
Build a web page
Building a web page is out of scope for this article. There are lots of tutorials about how to do this online.
If you're in a HUGE hurry, here's a web page you can use
        <html>
          <head>
            <title>My first web page on Amazon Simple Storage Service</title>
          </head>
          <body>
            <h1>My first web page on Amazon Simple Storage Service</h2>
          </body>
        </html>
Ok, here we go!
Amazon.com account
1
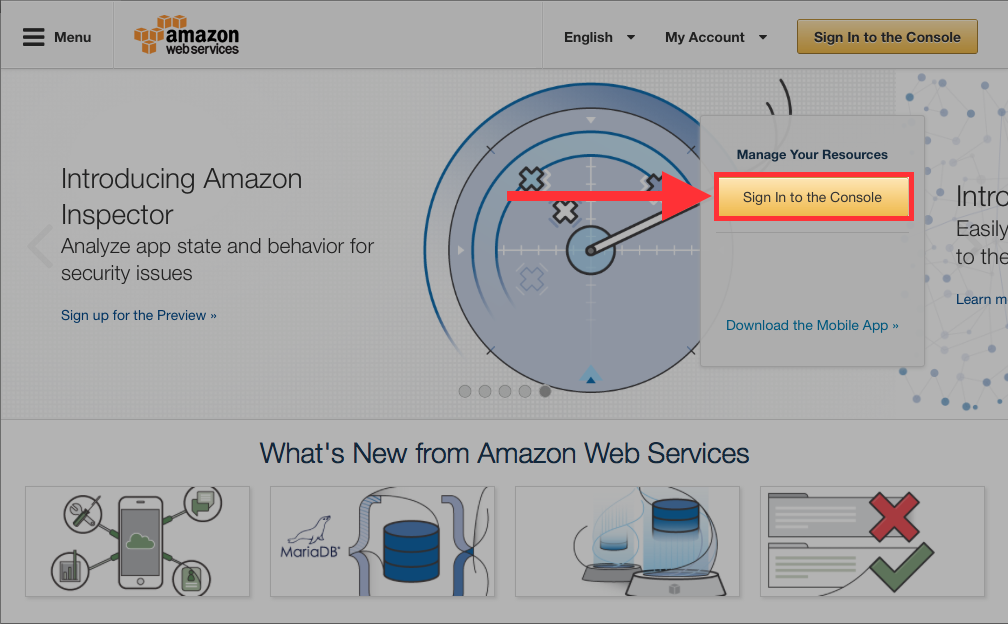
Go to the Amazon Web Services home page. Click the Sign in to the Console button.
2
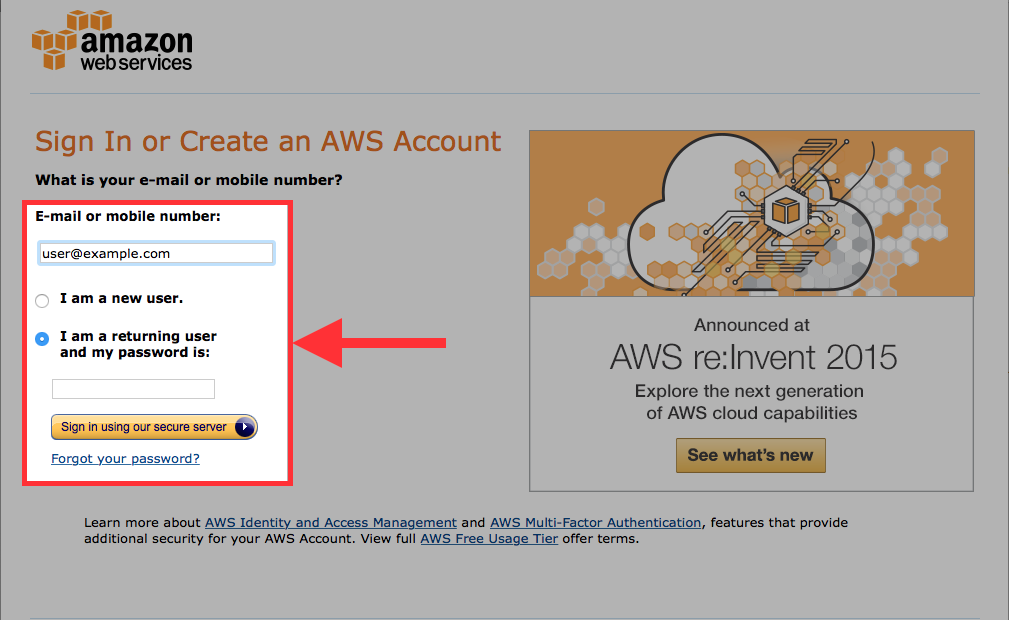
Sign in or create an AWS account. (If you already have an account with amazon.com, use that.)
3
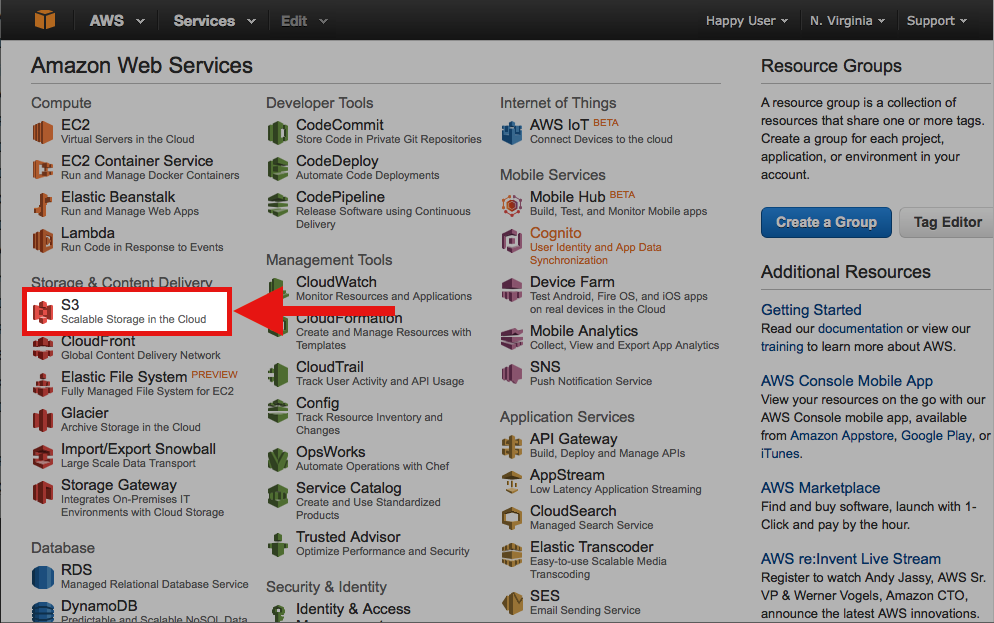
In the AWS Management Console, click the S3 link.
4
In the S3 Management Console, click the Create Bucket button.
5
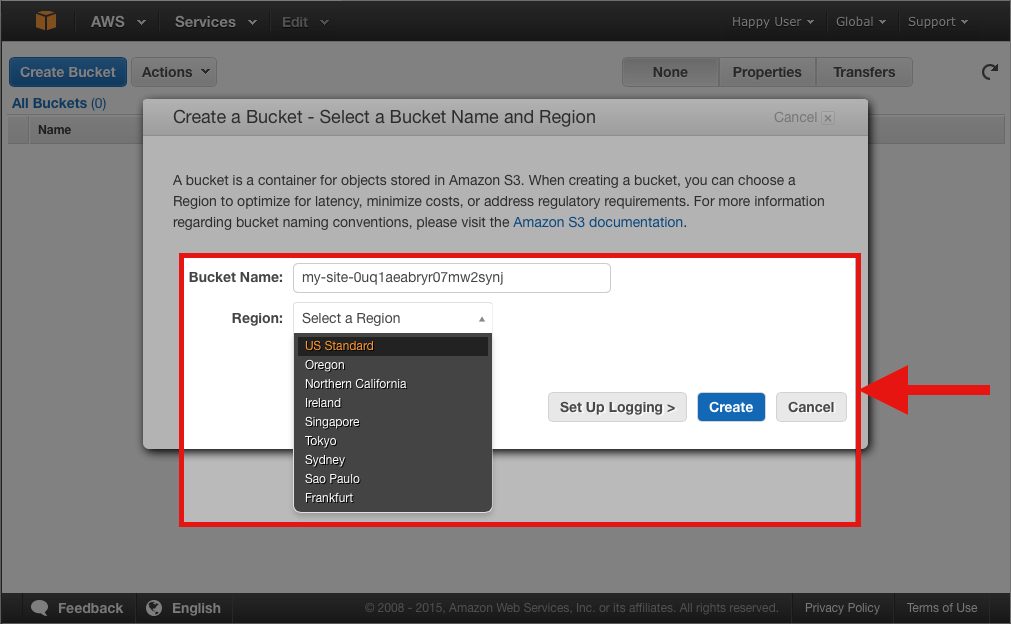
This is the first technical hurdle, but don't worry, it's not too difficult! We must choose a name that is unique within the Region we choose.
The name must also follow these rules:
- It must contain only lowercase letters, numbers, periods (.), and hyphens (-).
- Must start with a number or letter.
- Must be between 3 and 63 characters long.
- Must not be formatted as an IP address (e.g., 192.168.5.4).
- Must not contain underscores (_).
- Must not end with a hyphen.
- Cannot contain two, adjacent periods.
- Cannot contain dashes next to periods (e.g., my-.bucket.com and my.-bucket are invalid).
6
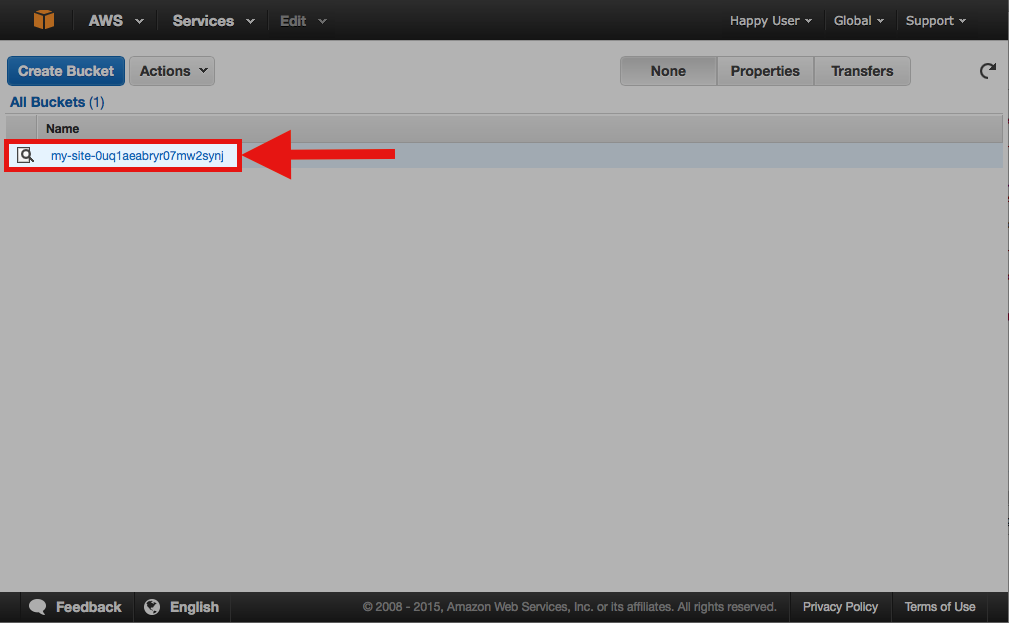
Click on the bucket you just created.
7
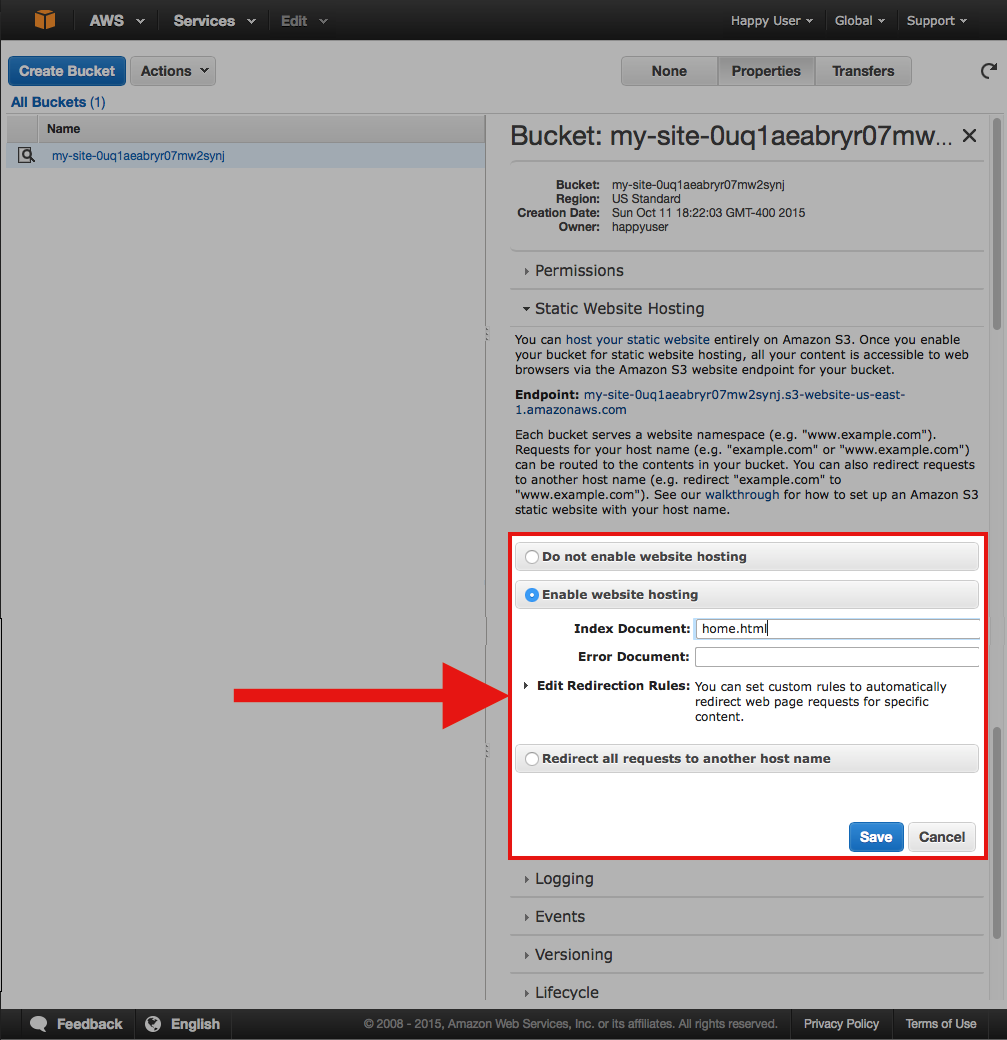
In the Bucket Properties, scoll down to the Static Website Hosting section. Click Enable Website Hosting, and enter the name of your default web page into the Index Document field.
8
Click the upload button.
9
Or select Upload from the Actions menu.
10
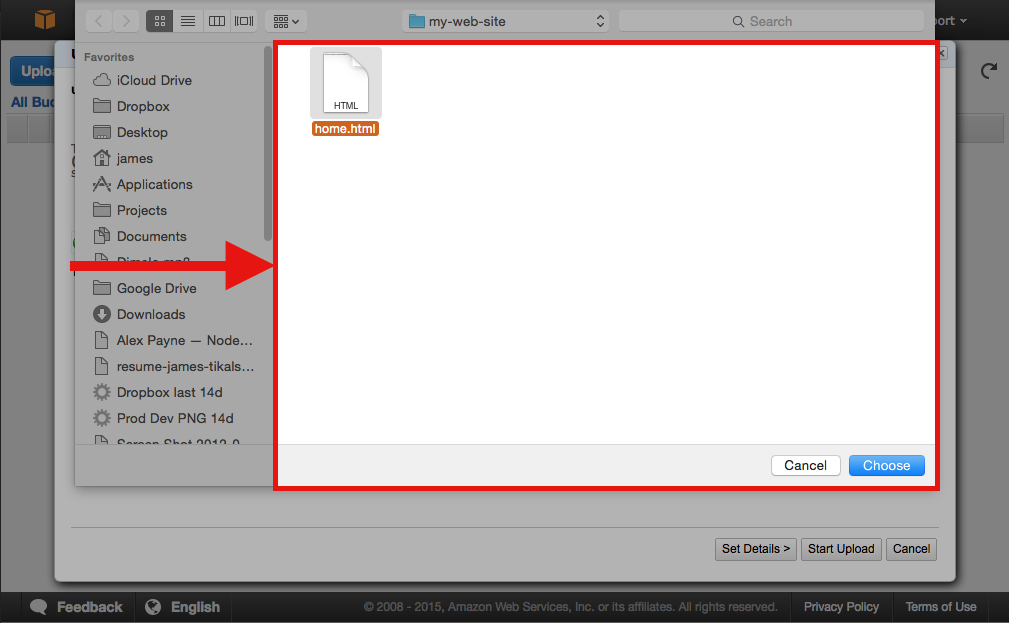
Click the Add Files button.
11
Find your home.html file and select it. Click the Choose button.
12
Click the Start Upload button.
13
In Bucket Transfers, you should now see message confirming that your file upload was successful.
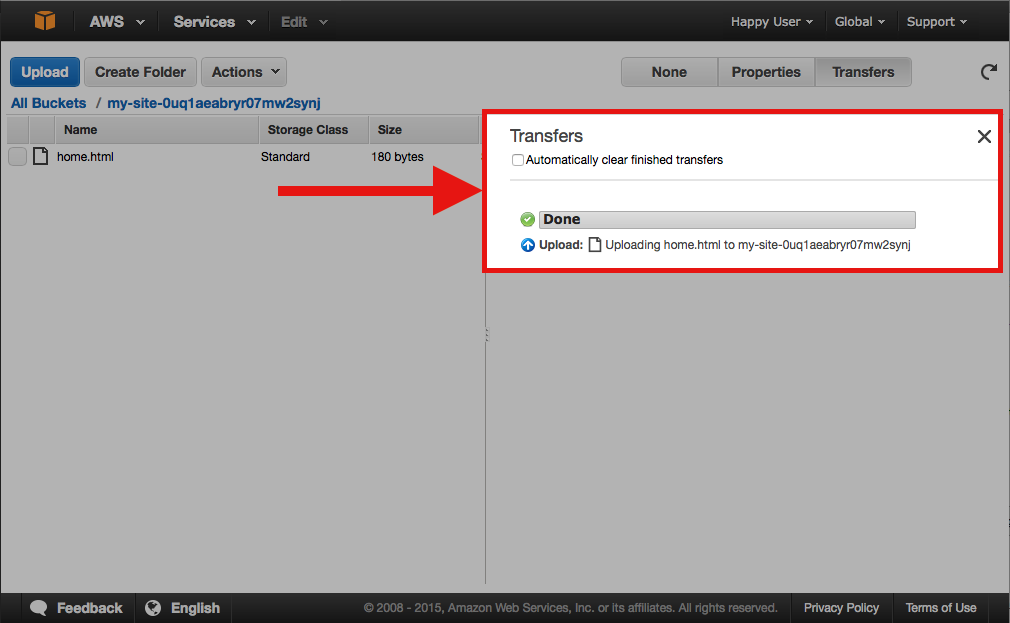
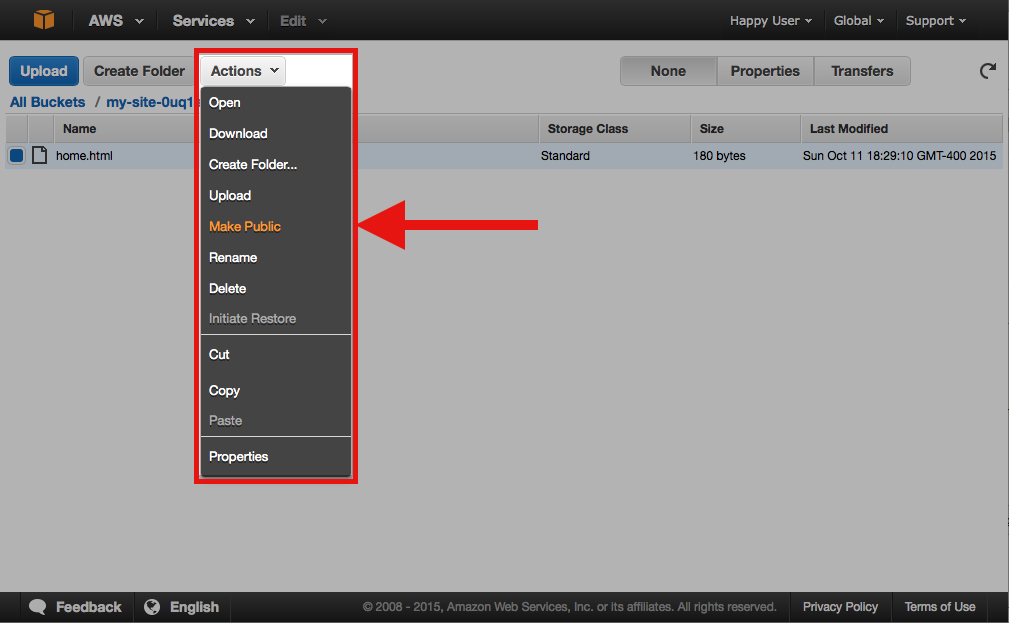
14
Select the uploaded file then click the Actions button. In the Actions menu, select Make Public.
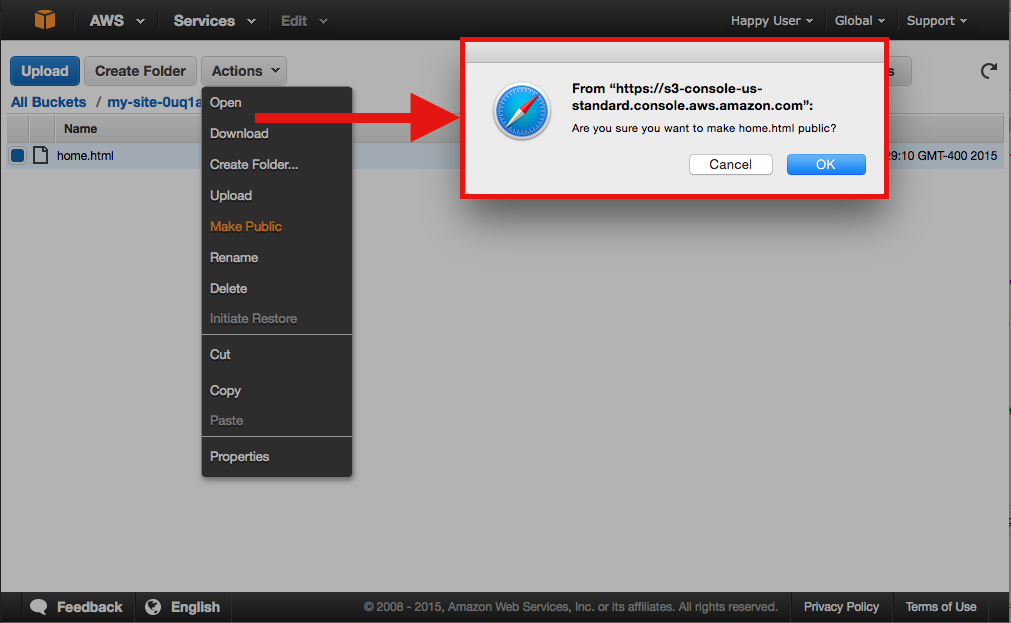
15
Click the OK button when prompted
16
In Bucket Transfers, you should now see message confirming that your file is now public.

17
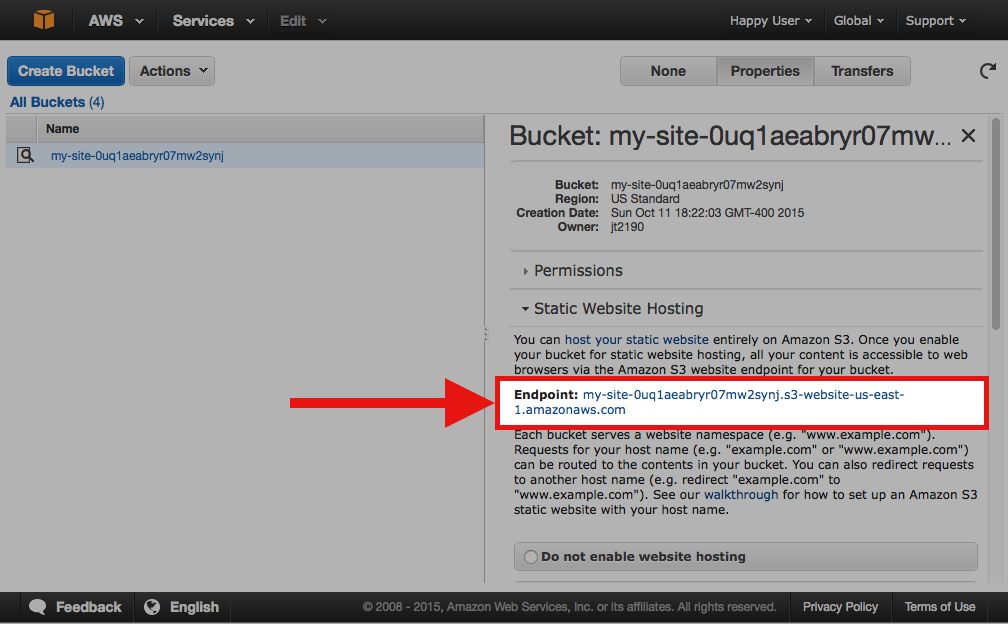
In the Bucket Properties, scoll down to the Static Website Hosting section. Click the link next to Endpoint.
18
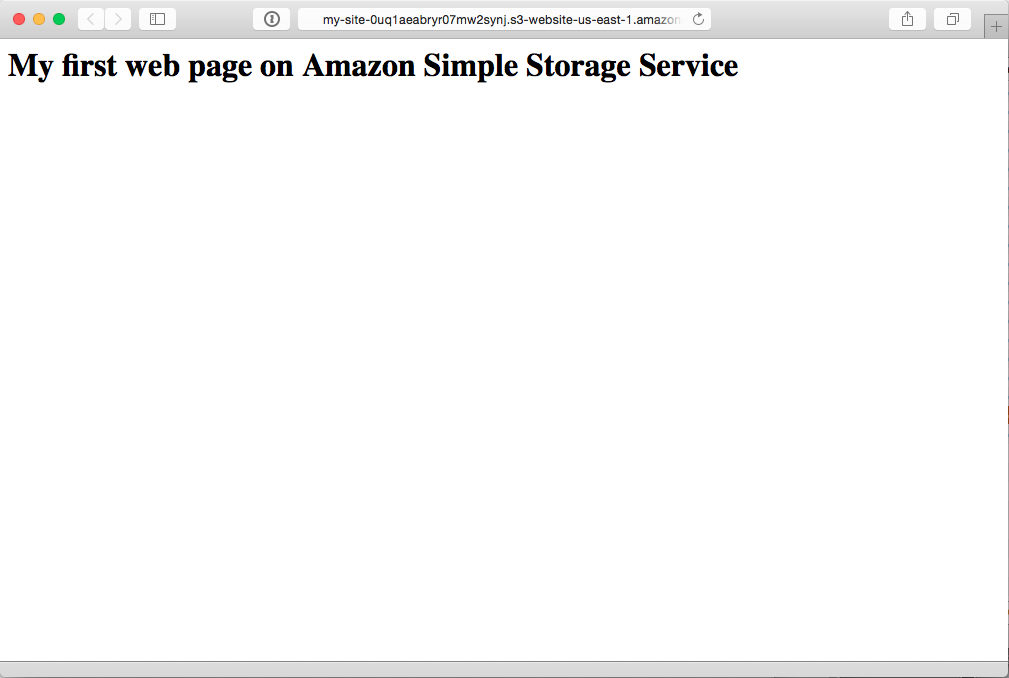
You should see your web page.